Lot Watch
The Problem
When Covid hit the world found out what shutting down the well oiled machine of commerce actually meant for normal people. "Supply chain issues" was such a common phrase that it became a joke in itself. For commoditites with already volatile pricing this meant that the day to day swing of fair market value could be in a huge range and monitoring these changes was crucial for my client.
MVP
When this project was introduced to me the existing workflow was to have an employee run a search on an auction site and manually scroll through listings inputting relevant information in a spreadsheet. This info would be refrenced post auction close and used to get the permalinks to the listing page where the final bid could be retrieved which would not be publicly available otherwise. This process could take several hours per day depending on the volume of listings and I knew that the sooner I could get something over to the client the better even if it was lacking sophistication.

Usually with these sort of projects the first thing I do is reach out to the third party about getting API access and sometimes if you're lucky they will allow you an API key at probablymore than what you were hoping to pay, but as is too often the case with these kinds of B2B companies I never recieved a reponse at all. Luckily later on I was able to reverse engineer the authentication used by the website and get API access through the normal user acccount. For the purposes of my MVP I decided to throw together a bot as a temporary solution.
Parsing HTML
I like to start with the biggest unknowns for any project and in this case that's doing the actual data parsing. For more complex web scraping/browser automation projects Selenium is pretty much the industry standard, but given that I wouldn't need to run any javascript for this target I went with BeautifulSoup since it's a self contained library and easy to work with.
def get_listings(zip_path, deleteFile=True):
    """return dict of listings given zip file path"""
    listings = []

    with ZipFile(zip_path, 'r') as archive:
        print(f'Received archive with: {archive.namelist()}')
        for html_file_name in archive.namelist():
            with archive.open(html_file_name) as html_file:
                html_contents = html_file.read().decode('utf-8')
            soup = BeautifulSoup(html_contents, 'html.parser')
            listing_divs = soup.find_all("div", class_="CLASS_NAME_HERE")
            for listing in listing_divs:
                try:
                    listings.append(json.loads(listing.text))
                except json.decoder.JSONDecodeError as e:
                    print("Invalid JSON:", str(e) + "\n Div contents:" + listing.text)
                    return None
    # remove upload
    if deleteFile: os.remove(zip_path)
    return listings, html_file_name
BeautifulSoup html parser
This really shows how straightforward things can get with BeautiufulSoup, more often than not you can narrow down the data you need with one line of python. In my case there was a CSS class unique to the data I wanted and I was able to use soup.find_all("div", class_="CLASS_NAME_HERE") to retrieve it.
I then wrote generate_csv() to save a CSV with only the desired info that the user could download and import into excel.
def filter_listings(listings, keys):
    # extract and format important data
    export_list = []
    for listing in listings:
        export_dict = {key: value for key, value in listing.items() if key in keys}
        index_map = {v: i for i, v in enumerate(keys)}
        ordered_dict = dict(sorted(export_dict.items(), key=lambda pair: index_map[pair[0]]))
        export_list.append(ordered_dict)
    return export_list

def generate_csv(listings, csv_filename):
    export_keys = ['list', 'of', 'json', 'keys']

    filtered = filter_listings(listings, export_keys)

    # Write to CSV
    export_list_values = [item.values() for item in filtered]
    # Create the uploads directory if it doesn't exist
    if not os.path.exists('processed'): os.makedirs('processed')
    with open('processed/' + csv_filename, 'w') as csvfile:
        csvwriter = csv.writer(csvfile)
        csvwriter.writerow(export_keys)
        csvwriter.writerows(export_list_values)

    print(f'Generated "{csvfile.name}" with {len(filtered)} lines"')
    return csvfile.name
function to generate CSV file
Now that the CSV was saved locally on the webserver I needed to send it back to the user, this was the server side code that would load the CSV into memory, delete the file from disk, and then send it to the client.
def send_csv(filename):
  # validate path
  if re.match('^processed/([\w\-.]+)\.csv$', filename):
      # load into memory and delete from disk
      file_buffer = io.BytesIO()
      with open(filename, 'rb') as file:
          file_buffer.write(file.read())
      file_buffer.seek(0)
      os.remove(filename)

      # Create response with CSV download
      bare_filename = filename.replace('processed/', '')
      response = send_file(file_buffer, mimetype='text/csv', as_attachment=True, download_name=bare_filename)
      return response
  else:
      return 'Invalid file request', 403
Flask code to send file to client
Frontend
I also threw together a super basic web frontend to go with this for the purposes of getting this over to the client as fast as possible. The user had to download the rendered html DOMs of the pages which they wanted data from and upload them as together as a zipped folder. This involved some extra training to hand over but given that it took a several hour process down to about 10 minutes for the user I decided it was worth the effort.
<div class="vertical-center">
    <h1>Lot Watch</h1>
    <form>
        <h3>Upload HTML</h3>
        <label for="fileUpload">Select a file to upload:</label>
        <input type="file" name="fileUpload" id="fileUpload">
        <input type="button" value="Upload File" onclick="uploadFile()">
        <div class="upload-status" id="uploadStatus">
            <div class="lds-ellipsis">
                <div></div>
                <div></div>
                <div></div>
                <div></div>
            </div>
        </div>
        <div id="uploadStatusMessage"></div>
    </form>
Super basic HTML form
 resulting web page once CSS is added
    function downloadCsvResponse(xhr) {
        // Create a URL for the file response
        const blob = xhr.response;
        const url = URL.createObjectURL(blob);

        // Extract the filename from the Content-Disposition header
        const filenameRegex = /filename[^;=\n]*=((['"]).*?\2|[^;\n]*)/;
        const filenameMatch = xhr.getResponseHeader('Content-Disposition').match(filenameRegex);
        const filename = filenameMatch && filenameMatch.length > 1 ? filenameMatch[1] : 'download';

        // Create an <a> tag with the URL as the href attribute and the filename as the download attribute
        const a = document.createElement('a');
        a.href = url;
        a.download = filename;

        // Simulate a click on the <a> tag to trigger the file download
        document.body.appendChild(a);
        a.click();
        document.body.removeChild(a);

        // Clean up the URL object to free up memory
        URL.revokeObjectURL(url);
    }

    function uploadFile() {
        document.getElementById("uploadStatusMessage").innerHTML = "";

        var fileInput = document.getElementById("fileUpload");
        var file = fileInput.files[0];
        var formData = new FormData();
        formData.append("file", file, file.name);
        var xhr = new XMLHttpRequest();
        xhr.open("POST", "/csv");
        xhr.responseType = 'blob';

        xhr.onloadstart = function () {
            document.getElementById("uploadStatus").classList.add("active");
        };

        xhr.onload = function () {
            downloadCsvResponse(xhr);
        };

        xhr.onloadend = function () {
            document.getElementById("uploadStatus").classList.remove("active");

            if (xhr.status !== 200) {
                document.getElementById("uploadStatusMessage").innerHTML = "Error processing file.";
            }
        };

        xhr.send(formData);
    }
Accompanying javascript to take a file upload and activate a download on web request complete
Deployment and MVP handover
I embedded all of the frontend JS and CSS into one file which got served by the same Flask instance hosting the backend API to keep things simple.
# Flask endpoint
@app.route('/')
def home():
    return current_app.send_static_file('index.html')
I then created a requirements.txt from my python virtual enviornment and dockerized the Flask API so that I could deploy it on Google Cloud Run.
# Use the official lightweight Python image.
# https://hub.docker.com/_/python
FROM python:3.10-slim

# Allow statements and log messages to immediately appear in the Knative logs
ENV PYTHONUNBUFFERED True

# Copy local code to the container image.
ENV APP_HOME /app
WORKDIR $APP_HOME
COPY . ./

# create working directories
RUN mkdir -p /uploads /processed

# Install production dependencies.
RUN pip install --no-cache-dir -r requirements.txt

# Run the static service on container startup. Here we use the gunicorn
# webserver, with one worker process and 8 threads.
# For environments with multiple CPU cores, increase the number of workers
# to be equal to the cores available.
# Timeout is set to 0 to disable the timeouts of the workers to allow Cloud Run to handle instance scaling.
CMD exec gunicorn --bind :$PORT --workers 1 --threads 8 --timeout 0 main:app
Flask Dockerfile
Cloud Run is Google's fully managed docker solution which handles autoscaling down to zero, automatic version handovers, and and bunch of other features which form the basis of Google's Cloud Functions service. Given that this app was only going be used for a maximum of a couple hours per day for a handfull of users I made sure to architect it so that I could take full advantage of these features. After setting up gcloud cli for my project I was able to automatically build and deploy the docker container using gcloud run deploy APP_NAME --source . --region CLOUD_REGION. By default this command spits out a public URL which I then tested and then was able to hand over to the client.
Starting Real Development
Now that the key feature of the project was done I could focus on making quality of life improvements for the user and work on making the app easier to maintain over time.
CI/CD
The first thing I did was set up Google Cloud Build to automatically deploy my container from master and then switched to deploying to a separate staging instance of cloud run for development.
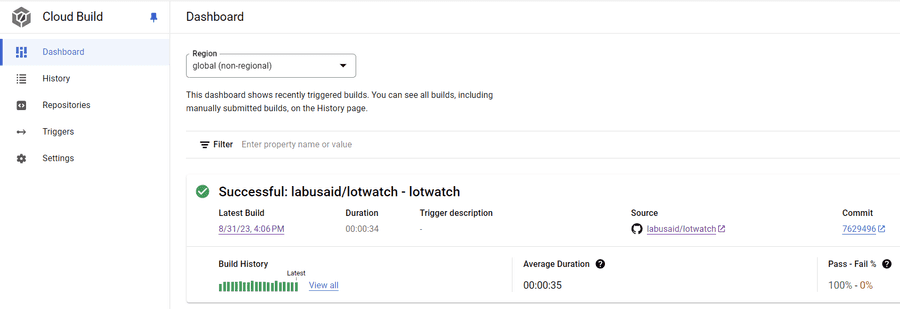 google cloud build dashboard
Page Cache
One additional thing I like to do whenever I'm making lots of repeated web calls is set up a web cache. This prevents accidentally triggering DoS or bot protection and allows me to set a cooldown so that the traffic dosen't cause spikes on the third party webserver when making a bunch of new requests.
def get_page(search_url, useCache=True):
  """takes a url and returns content from site or pre-existing cached version"""
  # create hash from url
  urlHash = int(hashlib.md5(search_url.encode('utf-8')).hexdigest(), 16)
  filePath = f'./pagecache/{urlHash}.json'
  # retrieve from cache if exists
  if (os.path.exists(filePath) and useCache):
      print(f'retrieved cached page for {search_url} from {filePath}')
      with open(filePath, "r") as f:
          return f.read()

  ## NORMAL WEB REQUEST HERE ##

  # cache page content for repeated calls
  if useCache:
      with open(filePath, "w") as f:
          f.write(response.text)
page cache logic added to existing web call function
Reverse Engineering and Rearchitechting
All of the web pages for this site were hidden behind a login so in order do any further automation I needed to figure out how the authentication process worked and make sure my app could replicate it.
Secrets Store
Authentication means working with login credentials so now was a good time to set up Google Secret Manager and pull variables into my app at runtime. In the Flask app I wrote a python module to retrieve the secrets from Secret Manager and then set them as enviornment variables so I could reference them later.
import os
from google.cloud import secretmanager

class Creds:
    PROJECT_ID = 'lot-watch'
    VERSION = 'latest'

    secret_prefix = f'projects/lot-watch/secrets/'
    secrets = ['app_user', 'app_password', 'service_password']
    secret_version = '/versions/latest'
    def __init__(self):
        client = secretmanager.SecretManagerServiceClient()
        for secret in self.secrets:
            # secret_req = client.secret_version_path(PROJECT_ID, secret, VERSION)
            # get secret from GCP
            response = client.access_secret_version(request={"name": self.secret_prefix + secret + self.secret_version})
            secret_resp = response.payload.data.decode('UTF-8')
            # Set secret environment variable
            os.environ[secret.upper()] = secret_resp
google secrets manager python module
From my main Flask file all I needed to do is import the module with from modules.creds import Creds and then instantiate it with creds = Creds() and later reference the secrets wherever needed with os.environ.get('SERVICE_PASSWORD').
To give the application access to these secrets I created and assigned a service account using the gcloud cli and cloud console.
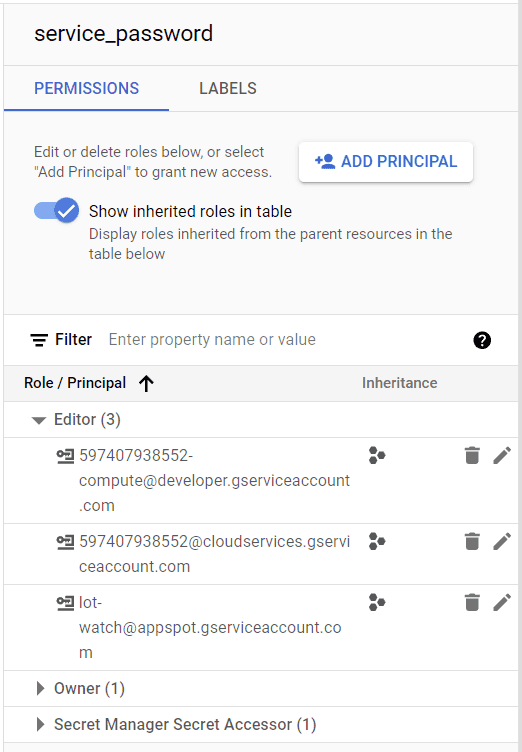 secret permissions for service_password
Authenticating
One of the first things I checked at the start of this project was doing a network capture of the target site and seeing if I could replay an API request from Insomnia, what I discovered was that I needed an authenticated session to accompany the auth token in the request. I'll skip over most of this since it involved a lot of back and forth between network captures and trying out web requests and resulted in some very long and ugly json that I ultimately seperated into a different module. Long story short I was able to get the app to create an authenticated session and make valid requests to the third party's backend API.
Database and Scheduling
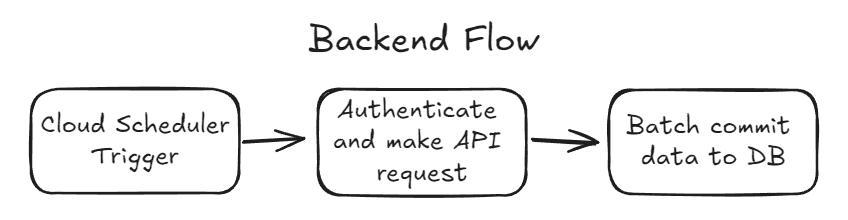
Now that I was able to collect data without any human intervention I wanted to seperate the data collection from the user requests. This involved setting up a Google Firestore DB to keep all the listing data in and then making a query to the db whenever the user requested to download an updated CSV file.
def store_listings(listings):
    # could be optimized with generator/yield
    print(f'writing {len(listings)} listings to db...')
    # convert to datetime
    time_format = "%Y-%m-%dT%H:%M:%SZ"
    for listing in listings:
        auction_start = datetime.datetime.strptime(listing['auctionStartTime'], time_format)
        auction_end = datetime.datetime.strptime(listing['auctionEndTime'], time_format)
        listing['auctionStartTime'] = auction_start
        listing['auctionEndTime'] = auction_end
    # split list into chunks of 100 for batch operations
    listing_batches = [listings[i:i + 100] for i in range(0, len(listings), 100)]
    batch = db.batch()
    for listing_batch in listing_batches:
        # generate doc id and add listing
        for listing in listing_batch:
            doc_ref = db.collection("listingsbyid").document(listing['id'])
            # print(listing['id'])
            batch.set(doc_ref, listing)
        # commit batch
        batch.commit()
function to format data and do Firestore batch commit
I then created an endpoint I could trigger with Google Cloud Scheduler, since my application could scale to zero and I need the trigger timing to be consistent, this also made it very easy to dial up/down depending on how much duplicate data I was receiving so.
@app.route('/updatedb', methods=['GET'])
def update_db():
    print('activated update_db() hook')
    listings = json.loads(listing_source.get_results_json('https://api.url.com', useCache=offline))['items']
    store_listings(listings)
    return 'OK', 200
Flask endpoint to trigger third party API request
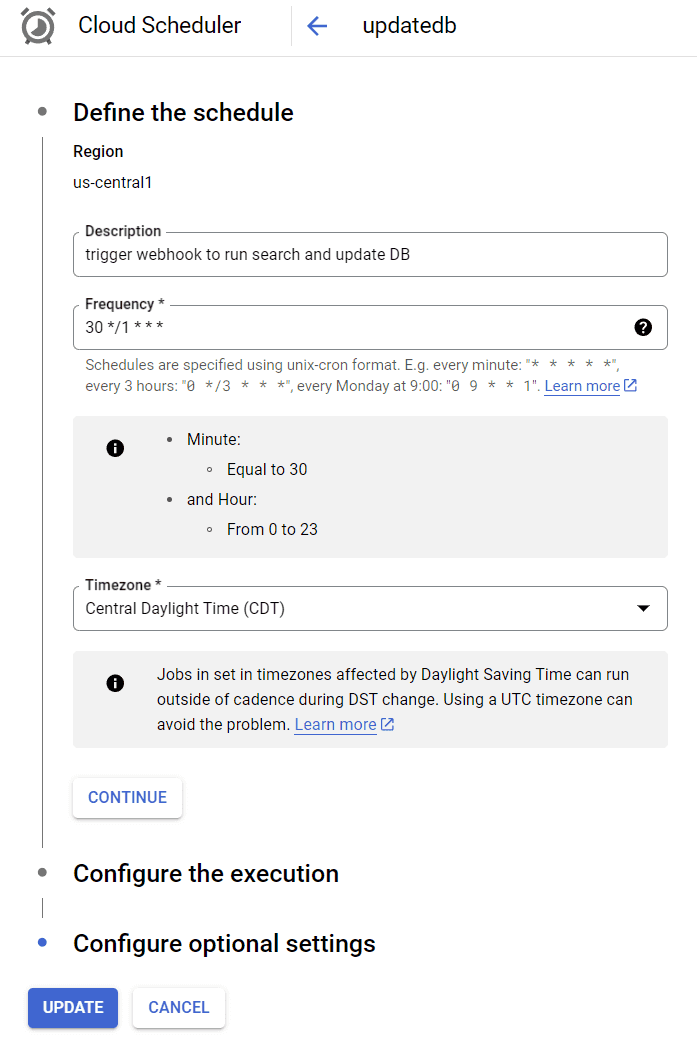 Google Cloud Scheduler job
This job is set to run once every hour, if you're not familiar with Unix chron format (or even if you are) chrontab.guru breaks things down well.
Frontend Updates

To wrap things up I created one more Flask endpoint which performed a Firebase query and then reused the existing generate_csv() and send_csv() functions. In this case I queried for the most recently ended auction listings. Also as a basic measure to prevent this getting triggered by bots or anyone else who might stumble across the site I added a randomly generated password which I provided to the users.
@app.route('/ended', methods=['POST'])
def ended_listings():
    # get current timestamp
    now = datetime.datetime.now()
    # run query for set number of auctions which have an end time in the past
    if (request.form['password'] != os.environ.get('SERVICE_PASSWORD')):
        return 'Incorrect Password', 401

    # DESCENDING is future->past
    # >= is future listings, <= is past listings
    listingsbyid_ref = db.collection("listingsbyid")
    query = listingsbyid_ref.where('auctionEndTime', "<=", now)\
        .order_by('auctionEndTime', direction=firestore.Query.DESCENDING)\
        .order_by('id').limit(50) # past listings

    listings = []
    for pages in range(ended_listings_count):
        query_results = query.get()

        listings_page = [doc.to_dict() for doc in query_results]
        listings += listings_page
        print(len(listings))

    csv_path = f'{datetime.date.today()}.csv'
    filename = generate_csv(listings, csv_path)

    # respond to client with CSV
    response = send_csv(filename)

    # generate CSV and send to client
    print(str(now))
    return response
Flask route to retrieve CSVs
And one more form added to the frontend to wrap things up.
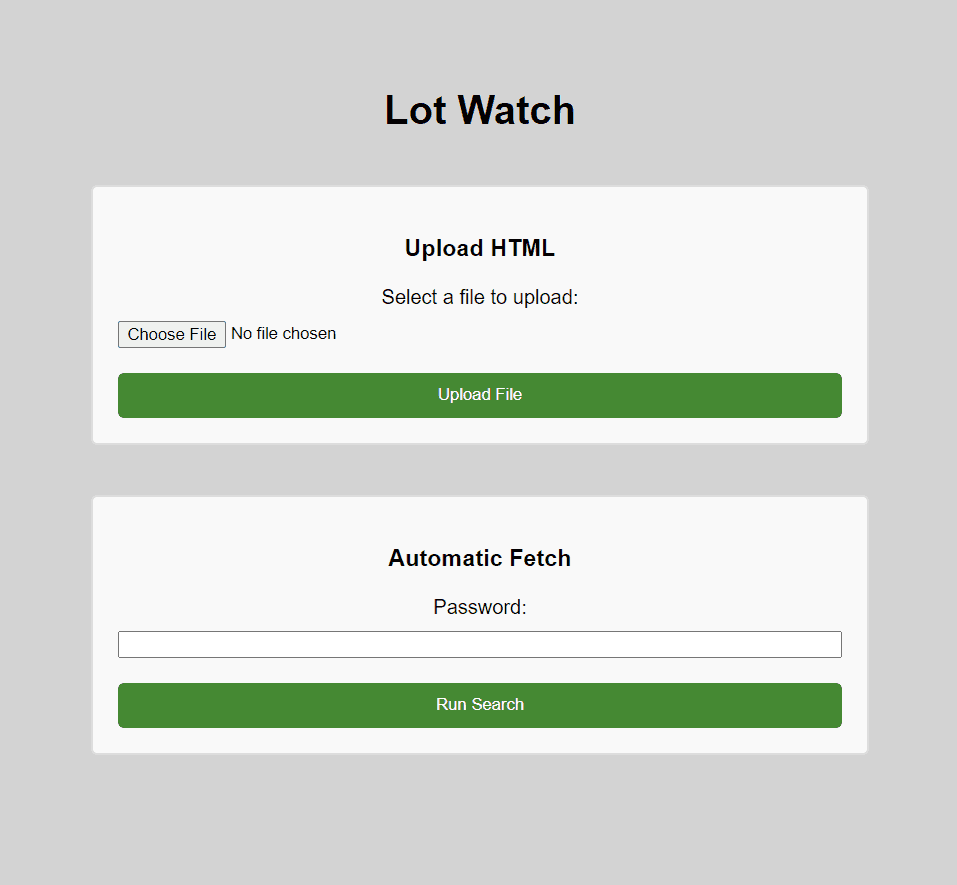 final (for now) lotwatch frontend
Final Thoughts
I ended up supporting this application for around 3 months after the final version, as with a lot of interally used applications the biggest running cost was keeping the database up. Scaling down to zero and designing in a cloud native architecture meant that I almost always stayed within the free tier for google cloud and even if I did have a larger user base the actual compute would have stayed very affordable. At some point the third party API changed their request format and since I had been monitoring the logs and metrics I knew that the usage of the app had mostly stopped by then. I confirmed with the client that they no longer needed it now that market conditions were more stable and decided to put everything into a cold state instead of pushing out a hotfix.
I'm very happy with how this project turned out and I'm sure it will probably get resurrected in some form eventually. If I had been presented with this project a couple years ago I don't think I would have taken a fully serverless approach but now that I have a better grasp of the offerings for AWS and GCP I always try to take that approach when possible. Autoscaling is often talked about for being a way to handle huge workloads but I find it just as valuble on the other end for small scale projects where large ongoing costs tend to kill off stuff that would otherwise be fine running for years without intervention.
This ended up being a very long and code heavy writeup so if you stuck with me this long, thank you. I try to keep most of these writeups straight and to the point but there were a lot of moving parts to this one so I thought it was a good chance to show off what a true "full stack" project looked like. I have a couple more projects in the backlog to write about so look out for those when I publish them!